Showing posts with label cookie. Show all posts

Tuesday, November 27, 2012

Butterscotch chip Chocolate chunk Cookie


Don't judge me please.
no, i do not only eat cookies and macarons for food. i eat proper, regular food too. honest! Ok, if you twist my arm and ask, yes, cookies make me much, much happier than pasta, rotis and chicken gravy :). So with that little bit of inconsequential info,  here's another star doing the rounds in my house. It is chewy, got a teeny bit of crunch, loaded with chocolate chunks, not too bad for the conscience because of the oatmeal, and hold your breath, got butterscotch chips!
Recipe adapted from here with changes

- 1 cup AP Flour
-1/2 cup oat meal processed to a fine powder
-1/4 cup regular sugar
-1/4 cup brown sugar
-75 g butter
-1 egg
-1 teaspoon vanilla extract
-1/2 teaspoon baking soda
-1/2 cup butterscotch chips
-1/2 cup chocolate chunks
 

- Preheat oven to 170 C.
- Mix together the AP flour, powdered oat meal powder, salt and baking soda and set aside.
-Cream the sugars with the butter till thick and fluffy, add the egg, continue to incorporate, add the vanilla extract.
-Mix in the dry ingredients with the wet, and fold in chocolate chunks and butterscotch chips gently.
-Refrigerate for 10-15 minutes. Using an ice cream scoop, scoop out dough onto the lined tray, remembering to place the dough with a gap of 3 inches in between each scoop of dough.
-Bake for 15-17 minutes till golden brown (remember to rotate tray halfway through).
-Take out of the oven, and leave on rack to cool. Enjoy with a hot cuppa or hot chocolate!
 

Saturday, October 27, 2012

Macarons in the time of rains and uncertainity

 
Where do i begin? certainly not the part where macarons have always intrigued me, especially when it took the blogging world by storm. most certainly not where i tasted an impeccable macaron and realized that it is indeed exquisite. i'm not going to dwell on how i scoured the internet poring over countless recipes. and i'm most definitely going to skip the part where i bungled up my first attempt and got ugly, but delicious cracked amarettis (well, they have no feet, so i can't call them macarons). and i'm not even going to get started about how egg whites need to be aged in a dry place and how humidity is the biggest enemy.
 
Instead, what i will talk about is what worked for me. 'Cos if there is one thing half a dozen eggewhites and and numerous fistfuls of almond meal have taught me, macarons, delicious and exquisite as they may be, they are temperamental and getting the perfect mac is dependent on the ingredients you use, the temperature of your environs & your oven, technique, and most importantly, on you. But, but, but, don't let any of that fool/intimidate you. It is pretty do-able if you get your basics right. sure you need a truck load of patience. and a bit of almond meal and egg whites. However, none of that matters when you see your macs emerge out of the oven with pieds! The sense of satisfaction when you bite into that perfectly formed cookie and get a mouthful of slightly moist/chewy insides and explosion of almond flavor is, to say the least, inspiring, rewarding and a good dose of endorphins. no joke! :)


One fact remains. Read up reliable literature on macarons as much as you can. Bookmark links and study. Read again. In the case of macs, knowledge goes a really long way 'cos we have to start somewhere and for that, we need the theory right. To that end, i will refer you to these links: Not so humble pie, Bravetart and Mactweets. I also had the indomitable Deeba of Passionate about Baking and the brilliant Nisha of Look Who's Cooking Too  also help me out with my inane questions amongst other things and they were the epitome of patient listeners. They were nothing short of wonderful and i hope i can return the favor someday. It makes a huge difference when you have a support system to fall back on and to share the happy dance with when you get the 'pied/feet', especially when it is lovely people like Deeba, Nisha, your sister and your pet. Really. That's experience talking.

This being an expensive and tedious hobby (for lack of better words), i decided to start with the basics so that i get my foundation right. and hence, lemon flavored macarons paired with blueberry preserve.
I intend to keep experiementing. However, the rains here are siding with Murphy (of the infamous Murphy's law) SO much, it isn't even believable! I mean, its been raining/overcast here since forever. i got to take a few okay pictures of the lemon macs on a relatively better day when the sun shone through clouds for about half an hour before it decided to go back again. The humidity also wrecks havoc on the macs so once the sun is back out, i'm looking forward to getting adventurous and making variations.
P.S: i tried a batch of chocolate macarons with nutella since, but the mositure content was so overwhelmnng here, i could barely get a skin even after leaving it overnight. They still tasted delish and i got tiny, adorable feet.


Here's to many, many more! (once we are over the relentless and overspilling rains, of course)
Recipe adapted from here

-50 g egg whites (aged for 2 days in room temp)
-100 g icing sugar
-15 g castor sugar
-55 g fine almond meal
-Zest of half a lemon
-Few drops of yellow food coloring (i used wilton)

You will also need clean, clean copper or steel bowls, Silpat to bake on and a Spatula.

-Blitz together the almond meal and icing sugar. Pass through a sieve, add the grated zest and and keep aside.
-Whip egg whites in a clean fat free steel bowl using clean and fat free whisks. Whip till light and foamy and tip in the castor sugar slowly. Beat till stiff, glossy peaks form.
-Preheat oven to 130C.
-Tip in the almond meal, add the gel coloring and wield the mighty spatula, 'cos now starts the folding. Lots have been said about folding in the macronage. Make sure you do not fold it in more than 45 times. Go around the bowl, scoop out from the center and under and bring it up and fold. Repeat till incorporated. You will knock out the air out of the meringue and that is inevitable. Do not fret. It is supposed to be that way. By the end, you are looking to have a thick, flowy, lava like consistency. A test to figure out if it is correct: scoop a teaspoon onto the silpat and check if the peak of the piped mound settles down in 30 seconds. if the peak remains, give the batter a few more folds.
-Pipe onto the silpat in even doses(i inch diameter) and leave uncovered to develop skin for minimum an hour.
-Bake at 130 C, top and bottom coil on. Bake for 15-17 minutes, or till the macs slide off the silpat with the least bit of resistance.
 
Store the macs in an airtight conatainer in the refrigerator for a day, and then try them. You have to allow them a day to let them mature.


Onto the stuff i have learnt, some the hardway, some through reading up and some through precious tips:
 - Double line your baking tray. Place your silpat on a straight (read NOT warped) baking tray/cookie tray and place that on top of another baking tray. Pop that into the oven. This helps distribute the heat evenly.
- You have to, have to make sure the surface you pipe out your macronage is even, straight and plain level. Else, no feet. This is why i use silpat and i have seen brilliant results personally.
- When in the oven, resist the urge to open the oven door to check on it, mine deflated when i did that.
 

Wednesday, October 10, 2012

Oatmeal-beurre noisette-chocolate chip cookies


i guess you could call me a cookie monster. i love experimenting with cookie dough to get the desired texture and taste. i love them chunky, chewy, chocolatey chunk-y. I love them buttery and french. i love how they resonate hazelnuts in every bite. i adore how they look (not to mention how easy they are to whip up)! love them as a snack and as a midnight meal. it was only natural i would want to make a deal out of it for my birthday too. and hence these Oatmeal-beurre noisette-chocolate chip cookies. they have the most amazing texture: slightly sturdy, slightly chewy, generously sprinkled with chocolate chips and the magic ingredients, oats, and of course, beurre noisette!


-1 1/4 cup oats blitzed to a powder (it needn't be super fine)
-1 cup AP Flour
-1/2 cup brown sugar
-1/2 cup regular sugar
- 1 egg
-112 g butter (divided)
-1/2 teaspoon baking powder
-180 g chocolate chips/chunks
-pinch of salt
- 1/2 teaspoon vanilla extract

(Makes 20 large cookies - Recipe adapted from here)
Onto the beurre noisette first: Take one half of the butter in a heavy bottomed saucepan and melt it over a low heat. It will foam up, then some white solids will separate and sediment at the bottom of the pan. Keep an eye on it and wait till the milk solids turn a light brown; nutty color. (Be careful it does not burn) Once it has reached that stage, take it off the flame and mix it in with the rest of the butter:
-Mix together the oat meal powder, salt, flour, baking powder and baking soda and set aside:
-Cream together the butter, beurre noisette and sugars. Add the egg and continue to mix till combined, then add the vanilla extract and mix.
-Mix in the flour mix and combine. Fold in the chocolate chips or chunks. The original recipe called for refrigerating the dough for an hour for chewy cookies - *see notes below.
-Butter and line cookie tray with baking paper. Preheat oven to 180 C.
-Scoop out medium sized balls of dough, flatten slightly to get a rough disc and place on the baking tray with about 2 inches spacing between each dough ball. Bake for 12-15 minutes, taking care to rotate the tray halfway through. Do not allow the cookies to turn very dark, just pull them out after the stipulated time. Allow to cool before transferring to a cooling rack.
-I generally like my cookies warm. This one tasted exceptionally yum when warm, but tasted almost as good the next day as well! What a winner!!


*Notes: I refrigerated my dough for half an hour or so and made sure my dough was only a bit cool when i popped it into the oven. The temperature of the dough affects the texture and composition of the end-result cookie majorly. Like i said, my dough was just cool and my cookies turned out chunky-chewy and crumbly.
i was in a mood to indulge myself (hey, it was my birthday) and added lindt 75 % for my choco chunks. ah, the bliss! Goes to show just how much of a difference good chocolate can make.


P.S: i'm on an instagram trip, thanks to the better half and the new ipad. am lovin' it!! (as is evident from the pics in this post and if you are following me on instagram)
P.P.S: i got the Zumbo book from my darling sister 'cos Mr. Adriano Zumbo is the flavor of the month/year for us and i'm loving his quirky style, sheer brilliance, and goofy smile. dazzled ought to explain it, really. :) Also, isn't his motto cool? ''Eat sweet and keep baking'', indeed!!

Truly a very blessed birthday! :)

Sunday, August 5, 2012

Banana Walnut Chocolate Chunk Cookie Cake


Yes, it is official. There is such a thing as a cookie cake. how, you ask? well, combine the goodness of brown sugar, the good ol' classic combination of banana, chocolate chunk & walnuts and a cast iron skillet and what do you get? a cookie cake!!! proof, you ask? i'm eating it as we speak.
Ok, i'm going to stop being cheeky now. I have been waiting to bake in the cast iron skillet for ages. and a hankering for banana-walnut cake caught me by surprise yesterday. Also, chanced upon this. So to cut a short story shorter, i finally did it and am now blogging about it. This is a one bowl affair. no fancy frills. no schmancy ingredients required. and it combines two great loves of mine, a choc chunk cookie and a banana walnut cake. So there, you have it! simple, no-fuss and just plain good. enjoy it warm with a scoop of vanilla ice cream drizzled with caramel sauce and have yourself a very happy weekend! (well, that's what i did anyway :))
If you are wondering if you can bake this in a regular cake pan, absolutely.


Recipe adapted from here with changes
Makes: 5.5" cookie cake

You will need:
-1 cup AP Flour
-1/2 teaspoon salt
-1/2 teaspoon baking soda
-1 egg
-1/2 teaspoon vanilla extract
-60 g butter
-1/2 cup brown sugar
-1 medium sized banana puréed
-1/2 teaspoon cinnamon powder
-1/4 cup roughly chopped toasted walnuts
-1/2 cup chocolate chunks


How you go about it:
-Preheat the oven to 175C.
-Sift together the flour, salt and the baking soda and keep aside.
-Melt the butter in the skillet over the stove. Add the sugar and vanilla extract in and stir to melt. It will look like a clumpy mess. Don't worry. Switch off the flame. Let it cool and then add the egg in. Whisk it in you will have a smooth glossy mix.
-Add the puréed banana and cinnamon. Mix.
-Add the flour, salt and baking soda and mix till you just incorporate it.
-Fold in the walnuts and chocolate and pop the skillet into the oven to bake for 20-25 minutes, or till the skewer comes out relatively clean but few crumbs still clinging on (ie, wee bit under)

Serve warm. it could be the best thing that's happened to you today, yet. :)

Sunday, June 10, 2012

Chewy Chocolate Chip Cookies


I've been on the quest for the quintessential chewy chocolate chip cookie for a while now. Simply because i am a sucker for the humble home baked cookie. Be it with beurre noisette or choc chips, the cookie is the way to go for me. Not just any cookie, mind you, i am pretty picky that way. I have my favs and ones i would'nt care two hoots about. That said, i love the chewy, thin versions with chocolate chips. I luuuve the single chocolate we get at Subway, they are chewy, thin, big, not overly dense and so packed with flavor, one is almost always never enough for me.
There are chocolate chip cookie recipes galore on the internet. Many tried. Some tested. few liked. very few loved and treasured. There have been quite a few hits and misses in the quest for the chewy chocolate chip cookie and then i chanced upon this recipe. This comes pretty darn close to my definition of the ultimate malted chocolate chip cookie, whaddyathink?


 (Recipe adapted from here with slight changes. Makes around 15 large cookies)

-100 g unsalted melted butter
-1/2 cup packed light brown sugar
-1/4 cup granulated sugar
-1 large egg
-1/4 cup malted milk powder
-1 teaspoon vanilla extract
-1 cup all-purpose flour
-1/2 teaspoon baking soda
-1 teaspoon salt
-1/2 cup mini semi-sweet chocolate chips


-Preheat oven to 170 C.
-Sift together the flour, baking soda and salt and set aside.
-Combine the melted butter and sugars using a hand held blender for about 2 minutes. Add the egg and continue to mix. Add the vanilla extract and blend. Now add the malted milk powder and blend.
-Add the flour mix and mix it ensuring it is not over mixed but completely incorporated.
-Fold in the chocolate chips.
-Scoop out the dough using an ice cream scoop onto the baking tray. Drop the dough a minimum of 3 inches apart (they will expand). Bake for 9-10 minutes or till the edges are light brown and centers puffy. Let it sit on the sheet for 5 minutes before transferring to a rack to cool.


On another note, the blog got this award for Storytelling from Sonali of the brilliant blog Only Fish Recipes. Thanks Sonali for the honor! :) so i'm going to have to share a totally random fact about myself and here goes: For all my love for dogs, i was once (and not too far long back) attacked and bitten by a very aggressive street dog. I was rushed to the Manipal casualty. i shall not go into the sordid details, but I had to obviously go through the entire gamut of injections that follow such incidents. Suffice to say there was a phase when i had very sore arms from all the injections and when i thought i would never get back to loving dogs again. it must have been the shock. 'Cos that lasted all of two weeks i think. I got back to coochy cooing almost every friendly dog i see in no time. i also started educating myself about dog psychology. i now have the most precious dog in the world who is one of the most important people in my life. she has some stellar doggie friends that include street dogs, show dogs, pie dogs, beautiful dogs and weird role playing dogs: all of whom i adore and have a great time with. All is well with the world again! :)

As is customary, i am passing this award onto 5 other blogger friends whose stories move me in one way or another:
Turmeric and Spice
The Harried Cook
Look Who's Cooking Too
Spoonful of Delight
Collaborative Curry

Monday, February 27, 2012

La dolce vita - Almond Biscotti with white chocolate chips


People in love with the Italian way of life, please continue to read. Others, ermm... you could still read and maybe fall in love with it after. I'm talking vespas, the charming language that makes even the frequently thrown in cuss word sound so sweet, water fountains dotting every other piazza, parmigiano cheese, authentic thin crust pizzas, charming Italian men, olives, Tiramisù, the mafiosi you've fascinated about in Mario Puzo novels, Gucci, serenades, the Mediterranean coast, the omnipresent gelatos, statues stamping the presence of Renaissance art... well, all these visuals make me very happy. Italy is definitely top on my list of countries to visit. Since a visa, finances and leaves from office (not necessarily in that order) are in the way of my dream right now, i'm going to make my peace with it by exploring Italian cuisine. and second in the series to the Tiramisù, we try the biscotti. (Dadada da da!! à la Sheldon)


The biscotti is a a twice baked biscuit originating in Italy. They are uniquely oblong shaped, crisp biscuits made in many combinations such as chocolate and almond, pistachio and white chocolate, cranberry and white chocolate etc...the possibilities are truly endless. Double baked because the loaf of cookie dough is baked once as a whole and then it is taken out of the oven, sliced into oblong shapes and then baked again. It is hard and has a domed top and a flat bottom, designed for dunking into coffee.

I made mini sized ones and tried using a combination of Ghirardelli white chocolate chips and almonds. Please feel free to improvise with the combinations and make it your own. The recipe i used was adapted from here with changes.

Ingredients:
50 g blanched whole almonds
60 g of sugar
1 egg
1/2 teaspoon of baking powder
1 teaspoon of vanilla extract
115 g of flour
a pinch of salt
half cup of white chocolate chips


Preheat oven to 150 C and toast the almonds till light brown in color. Set aside to cool and once cooled, chop coarsely.
Line a baking tray with baking paper and keep aside.
Cream the egg and sugar till pale and fluffy
Beat in the vanilla extract. 
Whisk together the flour, baking powder and salt. Add to the egg mixture and beat until combined. Fold in the chopped almonds and white chocolate chips.
Transfer the dough to a well floured counter and roll into a log shape. You may have to flour your hands to form the log as the dough is quite sticky. Place on your baking sheet and bake for about 25 minutes or until firm to the touch. Remove from oven and let cool on a wire rack for about 10 minutes.

Reduce the temperature to 165 C.
Cut the log diagonally into 1/2 inch slices. Place the biscotti cut side down on the baking sheet. Bake for about 8 minutes, flip it over and bake for another 8 minutes. Remove from the tray and once cool, store in air tight containers.


Thursday, December 29, 2011

Basic Sugar Cookies


Disclaimer: This is going to be an extremely short post. My fav time of the year is here and i could'nt be happier! Am super busy doing things i have to but all of that just adds to the season's charm! Bake a batch of these babies, it'll keep you and your family going! :) Happy Holidays!

I have always looked at the gorgeously decorated sugar cookies that abound everywhere on the internet with awe. They look so beautiful! (Gingy is my fav! :D) and so immaculately frosted! I had to try them out and the first step towards that was to find a failure proof sugar cookie recipe tailor made as per my needs. and below you see the fruit of a trial and error experiment. The original recipe is adapted from here, but i did a few alterations of my own and it works beautifully as well. Go ahead, try it. Happy Holidays!


What you will need:
2 1/2 cup AP Flour
1/2 cup Wheat flour
200 g butter
1 teaspoon salt
1 egg
1 cup sugar, powdered
1 teaspoon baking powder
1 teaspoon vanilla extract


Pre heat oven to 175 C and line baking tray with baking paper.
Sift together the salt, flours and baking powder.
Cream sugar and butter till light and fluffy (3 min). Add the egg and continue to blend.
Add the flour mix in batches making sure it does not fly around. The result will be a wet, crumbly dough.
Take it out of the bowl and knead onto your cleaned out kitchen counter that has been sprinkled with flour.
Place a baking paper atop the dough and roll out to a 1/4 inch thickness and cut out fancy shapes.
Place on the lined baking tray and place in the freezer compartment for 15 min. This helps the cookie from losing its shaping at the time of baking.
Bake for 12 - 15 minutes, taking care to rotate sheet halfway through to ensure even baking. Bake till golden brown and the tips have started getting brown. Remove from the oven and let it cool on rack before transferring to an air tight cookie jar.


These cookies are sturdy enough to be decked up with Royal Icing frosting AND soft & wholesome enough to be enjoyed as is. Go ahead, spread the cheer!

Friday, October 14, 2011

To a perfect Birthday: Meringue cookies / Oreo' kisses


I am over the moon. literally. well, not quite literally. but almost there. I had the good fortune to have an exclusive baking class WITH hands on experience with the super duper dessert and pastry team at the Courtyard by Marriott last week. Needless to say, it was one of the most awesome experiences ever! :) The joy was only multiplied by like a zillion times 'cos of the fact that i got to do it on my birthday! Darling Non stick, knowing his wife' weakness for adventures with the oven just had to do this for her. P.S: I know for sure that I am married to the right guy when things like this happen. :D Yes, i am blessed!


So one of the goodies on our repertoire was Meringue petit fours. This was the first time i was attempting the meringue. Pardon my ignorance and foolishness all you meringue lovers, but i had always dismissed it as eggy, wannabe macaroon-ish and 'not my kinda sweet fix'. i know, who was i kidding?.... ANYway, we worked on, piped it out and joked and made fun of each other' piped out shapes and exchanged some tips and i now proudly say, i love meringues! maybe the experience of doing it in a five star kitchen with such friendly folks had something to do with it as well.


Either ways, i plain love it. It's quick, easy and pretty on the eyes. I loved how the egg whites whipped up to the perfect consistency and how thick and glossy they got. I helped pipe out perfectly shaped/sized (and few not so perfectly shaped/sized 'cos the big pastry piping bag had to take some getting used to) meringue. I was intrigued at how something as simple as egg whites could metamorphose into something so different. And the taste of crispy  baked meringues! it literally, and i am not exaggerating, literally melts in your mouth. Neat stuff man! I had to make a batch the next day and i tried. and was mighty pleased. I mean, it is kid' stuff, but you know how the simple stuff in life can make you so happy. It's not rocket science. It's just making meringue. You've got to try it. Be it for a quick treat. or for a bake sale. or for a children' party. or to distribute as birthday treats (yes, that is what i did in office). or to stock up on the sweet quotient in the house.


Reading it up online, i came across this cool blog with very helpful pointers about making meringues. You will need to keep in mind the following notes... just in case, as Russell Peters would say:
Making meringues is kinda an art, especially in an ultra humid city. That just means that you have to be meticulous about certain things. Like how spotlessly clean your bowl, utensils, piping bag, blender blades, basically anything the egg whites come in contact with should be! Believe you me, being clean bordering on OCD is good here. Try to use glass or steel stuff as much as you can, as plastic tends to have a film of grease how much ever you may clean them.
Another thing you have to be particular about is the measurements. You may want to keep in  mind, the ratio is 4 tablespoons for an average sized egg white.


This recipe makes 40 average sized small cookies. So to begin with, you will need :

2 Egg whites
8 tablespoons Sugar
1/2 teaspoon Vinegar
Sprinkles for garnishing
Flavorings/Colors (Optional)


How you go about it:

-Preheat oven to 110C

-Line the baking tray with baking paper.

-Make sure the eggs are at room temperature and carefully, i repeat very carefully separate the whites from the yolk. You dont want even the tiniest speck of yolk in the white, as that can mean disaster in whisking the whites to the consistency that we want. To be sure, make sure you separate them into separate smaller bowls before transferring the whites alone to the mixing bowl.

-Whisk the whites till soft peaks form.

-Gradually, and i repeat, gradually add the sugar and continue to whisk till the sugar dissolves and the mix becomes a thick, luscious and glossy mix. The mix should be beaten till it hits the stiff peaks stage, which is to say, it appears glossy and when the beater is lifted, the mix stands in tall peaks and it does not curl at the tips.


-At this point, add the vinegar and continue to whisk till combined.

-At this point, if you want to color the meringue pretty colors, separate parts into separate clean bowls and add the desired colors. I chose to go ahead without color but to add a a quarter teaspoon of the exotic Gianduia. Whisk again till just combined .

-Scoop into the piping bag and let your imagination run amok. Fascinated-by-the-wife'-antics/exclamations-Non stick chimed in and wanted to do 'kisses' à la Hershey, but with a twist. We loved it. and i named it 'Oreo' kisses'. 'Cos it is pretty, like Oreo. And swirly too, like her. Sprinkle the non pareils or jimmies.

Bake for an hour or so a little less, depending on how crisp you want your meringue kisses.

- A note about baking the meringue: It ought to sit in the oven for 55 min or an hour 5 min depending on how marshmallowey or crisp you want them to be. Do the skewer test and check if the inserted skewer comes clean. If you like it a tad browned leave it on in the oven for 5 minutes longer at 120 C.
Once done, turn off the oven and let the meringues cool inside the oven for another 20 minutes.

You are good to go! :)


To store: Meringues do not keep well in humid areas. So make sure you store them in an airtight and dry jar, each separated by a sheet of baking paper. Also, however greedy you are, always dry your hands before digging into this jar or picking up one of these babies.

Indeed a happy Birthday! :)

Monday, September 26, 2011

Hazelnut Sandies

Nuts about Nuts - Chapter I

Hazelnut Sandies


I am starting a new series here called the 'Nuts about Nuts' edition. One simple reason: I am nuts about Nuts.  Its in my genome. I come from a family that has emphasized the goodness of the few blanched almonds in the morning cereal since we were kids. The pistachio and honey in the baklava make a world of a difference to me. The chopped and toasted macadamia nuts that would adorn our birthday cakes when we were growing up were a classic. I turn to mom-made peanut butter sandwiches for comfort. Heck, even Oreo loves peanut butter. Using it in my food adds a certain oomph and feel good factor to seemingly regular fare.True, my repertoire of nuts has been restricted to very very few. So i decided to forage. The current discovery chez Zachs is the infinitely good (read addictive) and flavorful hazelnut.

This cookie is essentially an icebox cookie. Icebox cookies are cookies made from a dough which has been refrigerated or frozen, typically in a log shape. The chilling of the dough makes it easy to work with but more importantly, keeping a batch in the freezer ensures the quickest cookie gratification. The dough keeps for upto a month when tightly wrapped in the freezer.


The recipe has been adapted and halved from here. Thank you Bakingdom! For a batch of 18 hazelnut sandies, you will need:

3/4 cup hazelnuts - toasted and skinned*
1/4 cup sugar
1/8 cup brown sugar
1 small egg yolk
80 g butter
1/4 teaspoon salt


 How you go about it:

-Line your baking tray with baking paper and preheat oven to 175 C.
-Process the hazelnuts till you get the closest you can to a fine powder. (It will be mealy, but no worries)
-Sift together the flour and salt and add the sugars and and blitz it in the processor till it is all well mixed. (Scrape at the bottom and make sure all the that it becomes a homogeneous mixture)
-Add the cold and diced butter over the mix and keep pulsing. The mix will now look like coarse, wet sand.
-While the processor is running, add the egg yolk and continue to mix till it clumps into a ball.
-Divide the dough into two halves and shape them into evenly shaped logs 2" in diameter. Wrap in cling film and freeze for 30 min.


 -Remove from the freezer, remove the cling, and with a sharp edged knife, cut slices of .3" width. Rotate the log every few slices to ensure that you get round slices.

(You may taste the dough at this point. and marvel at that delish taste. i had to keep myself from eating up a substantial amount of dough. Yes, i am weird)


-Bake for 15 - 20 min till evenly baked (rotate the tray halfway through). The cookies will get some color and will be soft to touch but will set as they cool. Keep aside on a wire rack to cool.

Now onto the beautification (not that it needs any, but how can you say no to the eternal combination of chocolate with hazelnuts???)

-Melt 7 squares of milk chocolate in a bain marie and once it's cooled, pour into a piping bag or improvise and cut a tip off a zip lock bag. Or you could use nutella (evil grin).


-Once the cookies have cooled, drizzle the melted chocolate. Keep aside to set. or if you are anything like me or my better half, unabashedly wolf down four in a go (If Oreo were given a chance, she'd single handedly finish the jar). Welcome to my world!


P.S: As you can see, i did freak out with the piping bag and doodled away to glory. It tasted just as yum, nonetheless! :)
Moving on, if  you thought that these cookies could'nt get any better, here' a tip. (My better half is forever looking for ways to improvise and eat ice cream and this time, he may have hit the jackpot). Crumble a cookie over a scoop of vanilla ice cream and dig in . i guarantee you nirvana. Really!

Tuesday, July 12, 2011

A lot can indeed happen over coffee


It hit early this time. I was feeling ditzy, restless and my mind was wandering constantly, particularly when i was supposed to be drawing up reports. Not a good sign. Mid week crisis had set in early this week. It was just Tuesday and I had to bake.

and so i decided to dare a bit. I have never been a coffee/tea person. I like my milk as milk, thank you. I always have. and i have seen souls hooked to their cuppa. I know plenty of them. enough to make me wonder. Mind you, the surplus of Baristas, Coffee Days, Cafe Pascuccis, Gloria Jeans and Brios have ensured that i have nothing against the cappuccino and the mocha in its many forms. Its just that I have never been hooked per se.


So i decided to tread on previously untrodden waters and test the mojo of coffee by trying this espresso-chocolate chip cookie recipe. I was pleasantly surprised. I quite like it. :)

With many adaptations, this is the recipe i followed:

Espresso Chocolate Chip Cookie
2 cups flour
155 grams unsalted butter
1whole egg
1 egg yolk
1/2 teaspoon vanilla extract
3/4 teaspoon salt
3/4 teaspoon baking powder
2 1/2 tablespoons instant coffee powder (i used nescafe)
1/2 cup white sugar
1/2 cup brown sugar
3/4 cup semi sweet chocolate chips

Makes 24 cookies


How you go about it:

- Line a baking tray with baking paper.
- In a dry bowl, whsk together the flour, baking powder, salt and espresso powder and set aside.
- Cream the butter and sugars till light and fluffy
- Gradually add the egg and yolk, one at a time and blend well. Follow that up with the vanilla extract
- Add the flour mixture to the wet mix and blend just so it is all mixed well.
- Fold in the chocolate chips
- Refrigerate the cookie mix for half an half an hour so that it firms up a bit, enough to aid you when scooping it up.


-Take the mix out of the refrigerator after half an hour, scoop up using an ice cream scoop, drop onto the baking try and flatten out. Drop the scoops with space of half an inch to spare.

-Bake for seventeen to twenty minutes or till dark golden brown and the sides begin to darken or tad longer if u like it a little crisp.
-Take out of the oven and let cool on a rack before wolfing it down with or without a glass of milk (hot or cold!)

Am a fan now! :)

P.S: A lot can indeed happen over coffee!

Saturday, July 2, 2011

and that's how the French do it... Sablés

True, we've been more 'away' than 'available' these past few months, and all for good reason. It's been a crazy whirlwind of work, precious precious family time, real life drama (in small doses, thank God!), travel (yes, we finally stayed at The Leela, Kovalam, amongst other things!!! You'd think 'Mindblowing' would suffice to descibe the place , but no... it's awesome and mindblowing stuff :D...), occassional baking to keep me going and the exhaustion that resulted from all the mentioned activities.

I got to spend time with Ethan and dig this: the fellow's a charmer all the way. This is what he looks like now and the entire family assembled from different parts of the world and had a great time at home. Ethan's a natural with dogs (how proud am i of my 2 year old nephew!) and Oreo's a natural with kids (how proud am i of my baby girl!) The two had so much fun together not to mention us who were looking on and laughing at their funny games. My brother clicks super neat pics here and got to travel quite a bit and capture Kerala resplendent in its Monsoon glory (sigh! i miss home!)


Amidst all this, we were in B'lor for non-stick' birthday and did what we do best in B'lor: chill and eat our hearts out (they have SO fricking many options and this time, Sunny's in Indira Nagar was the favourite for food with Toit being the fav for hangout/dance/music on a Sunday night). We got to spend time with family and also indulged in some dog therapy. :) Cousins Shane and Shrey are now parents to Buffy a.k.a Buffster. He's a 7 months lab, adorable, smart and a sweetheart.

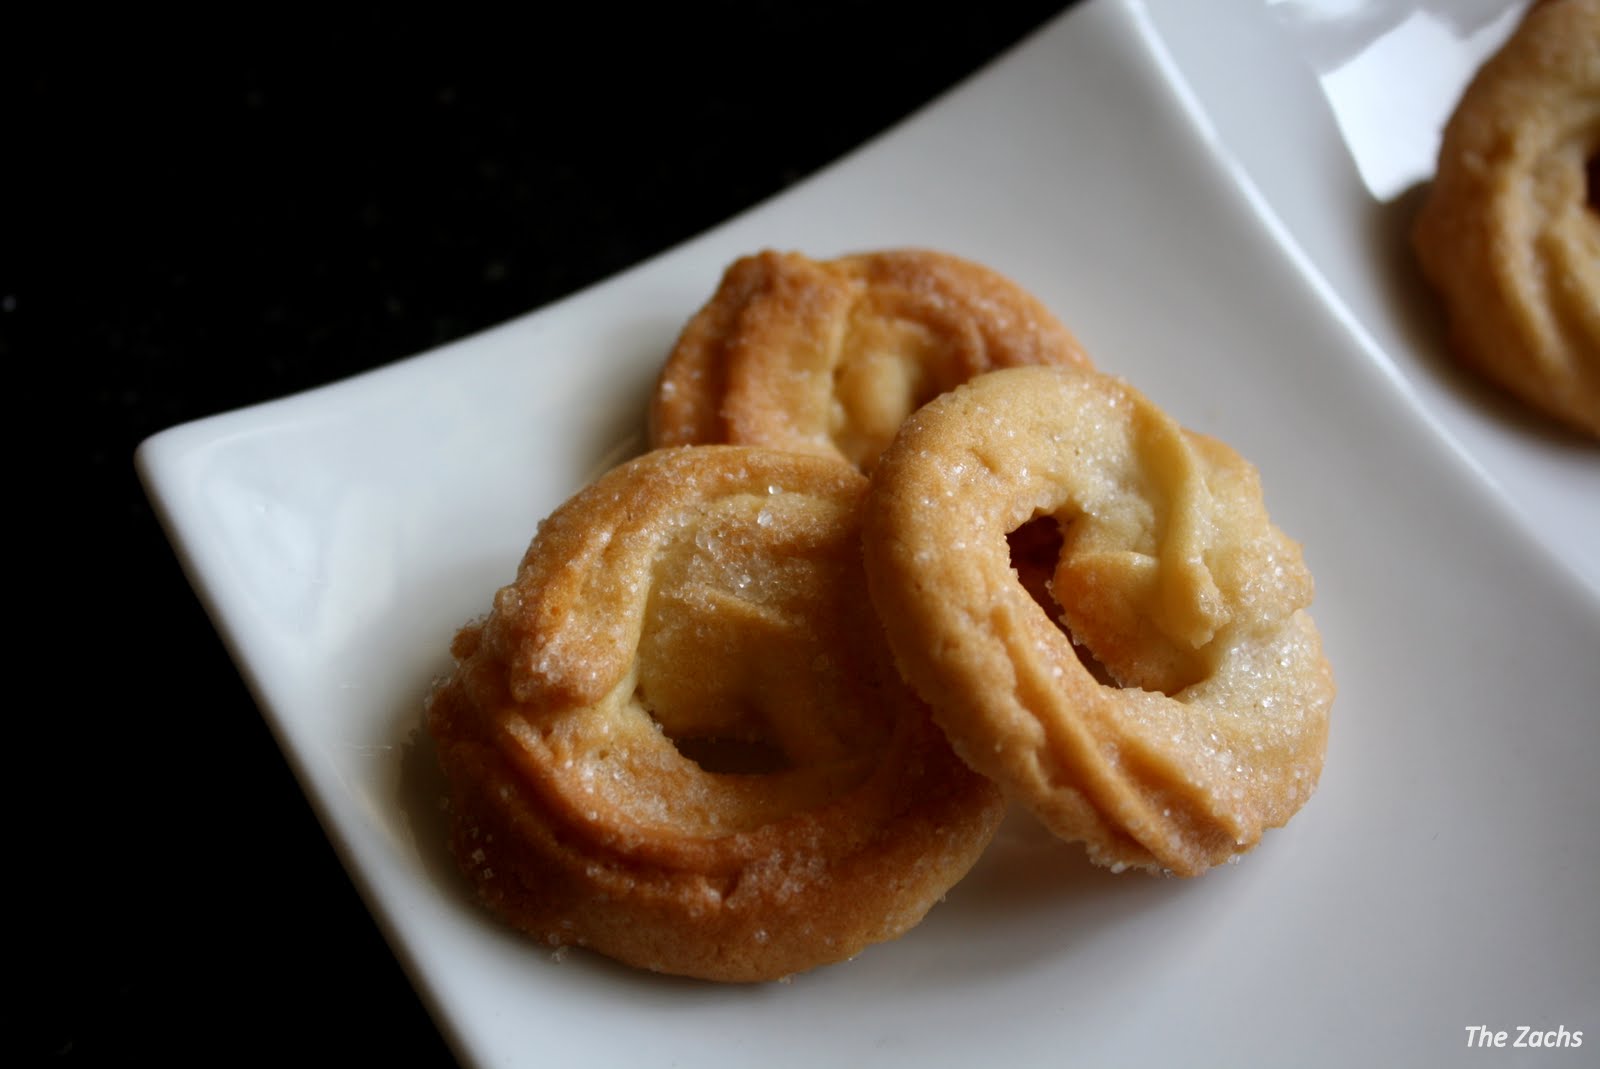
Non stick on returning from his trip abroad got me the popular, very familiar, round, blue tinned Danish Butter Cookies. All of us who have been abroad or had people coming from abroad are only too familiar with these buttery, slightly salty, sugar coated, melt-in-mouth cookies. These are one of the things we kids grew up on and my favourite always used to be the one that was piped out in pre
tty twirls. The tin non-stick got finished in no time (deja-vu??) and the craving for more remained.


That is when the Hestia intervened and i saw Look Who's Cooking Too's post on Sablés which are nothing but the butter cookies I have always wished i had a secret, bottom-less stash of. Is this the best or what? Me being me, i did my research to find out more. They are called sablés 'cos they are sandy (sable in french for sand), crumbly, delicate and originated in Normandy, France. Yet another thing i'm indebted to you guys for!


It's a breeze to make and here' how we go about it (adapted from Look Who's Cooking Too)

Things you will need:
-115 g All purpose flour
-90 g unsalted butter at room temperature
-1/2 teaspoon vanilla extract
-1 teaspoon salt
-45 g powdered sugar
-1 egg white (of a fairly small egg) and

-Baking tray lined with baking paper


The Procedure

- Preheat the oven to 150 C

- In a bowl, whisk the butter until smooth and creamy
- In another bowl, whisk the flour and salt and keep aside.
- Add the sugar to the butter and continue to whisk till smooth creamy again
- Add in the egg white to this mix and whisk till it looks homogenous. The mix may appear to curdle, but do not worry, whisk it and make sure it is thoroughly mixed
- Add the vanilla extract and yes, you guessed it right, whisk
- Add the flour mix to the butter egg white mix and continue to mix it in till thoroughly combined.

Scoop it into the piping bag fitted with a star nozzle and pipe onto the prepared baking tray with a spacing of an inch in between.

OR if u wish to devour shapes, halve the mix into two, wrap them each in clingfilm and  flatten it out slightly and refrigerate for at least an hour (that's keeping the humidity in Chennai in mind) or half an hour for not-so-humid lucky places.

Take a disc at a time out of the refrigerator, roll it out to .4 cm thickness while still wrapped in film and use a cookie cutter of your choice.

Bake at 150 C for 13 minutes. Check on them halfway through and rotate the baking tray if need be. et Voilà! you have your sablés ready! Get ready to get hooked!